
Redtail CRM offers subscribers a ton of opportunities to customize their CRM, both at the individual and at the database level. These opportunities for customization are important because they allow you to set your database preferences and lists up in ways that work the best for both you as an individual as well as for your office. Taken together, these customization options will help drive user adoption and, ultimately, help you streamline your processes while at the same time personalize and improve the client experience your firm provides. You can browse all prior posts in this series here. In this post, we'll take a look at how you can manage Custom Export Templates.
Redtail CRM has many Standard Reports built in to your database. Additionally, there are standard exports and reports available as Result Options on your Advanced Search page. Still, you may find that none of our default reports or exports contain the exact information that you need to produce in Excel format. This is where Custom Exports come in handy, as they allow you to handpick the fields within Redtail that you'd like to see in your Exports, and then run those Custom Exports for individual contacts or in bulk.
You can think of Custom Export templates as DIY Reports. While there is no end to the uses you might make of these, one very common usage is in the data cleanup process, as exporting your desired data field(s) for your desired contacts will allow you to quickly determine where data is missing in your CRM or where the style guide conventions you've established for specific fields have not been followed. In either case, when you have that information laid out in front of you in Excel, it's much easier to make bulk updates to correct any issues you see, something we'll address more fully later in this post.
Let's take a look at creation and usage of Custom Export Templates in Redtail CRM.
Creating your Custom Export Templates
To begin setting up a Custom Export Template, select Manage Your Account after clicking your Name from the Top Right Menu within Redtail: 
Then, click "Custom Export Templates" in the Manage Templates area:

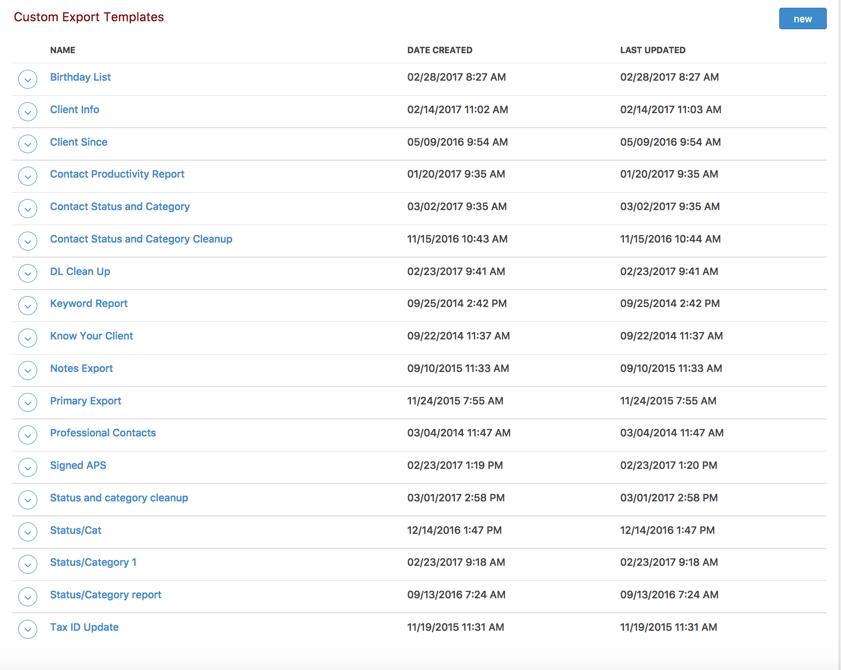
You'll then see displayed an alphabetical list of all of the custom exports that have previously been created within your database, along with the dates they were created or updated:
We'll cover later how to edit existing custom exports, but first let's look at how you create new ones and how you actually run an export after creation. To create a new custom export, click the New button in the top right corner of your Custom Export Templates page. You'll then see your Export Builder, a sample portion of which is displayed below:
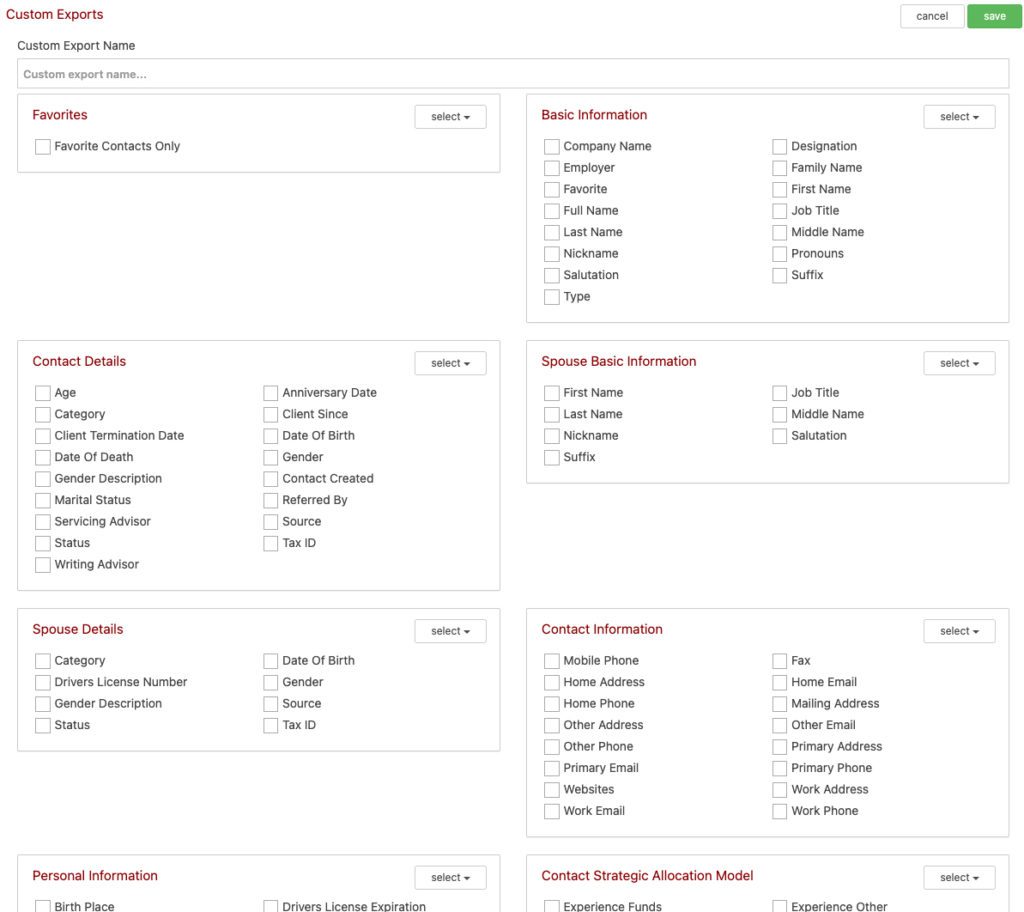
From this page, you can select each of the fields that you'd like to include in your Custom Export. Note that there is a Custom Export Name box at the very top where you must populate a Name for your Custom Export in order for it to save. Note as well that each section has a "Select" menu in its upper right corner which will allow you to easily select All or None of the fields within a given section. Once you've selected each of the fields you want to include, click Save, which is accessible both above and underneath all of your Field options. You'll then have an opportunity to drag and drop your selected fields around so that when you run your export the fields display in your Excel file in your desired column order. When satisfied with the field ordering, click Save. Your Custom Export Template will then be available for your office to use.
Running a Custom Export
So, how do you run one of these exports for a desired group of contacts? Let's say that you want to run this export for a Quicklist within your database called "401k Participant". After sending this Quicklist to your Advanced Search page and selecting each of the individuals you want included in the export, you can select the export you just created by clicking Custom Exports from the Contact Options menu above your search results: 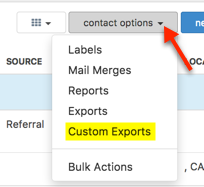
After clicking "Custom Exports", you'll see an Export Contacts box that will allow you to choose from your Custom Export templates and run the Export: 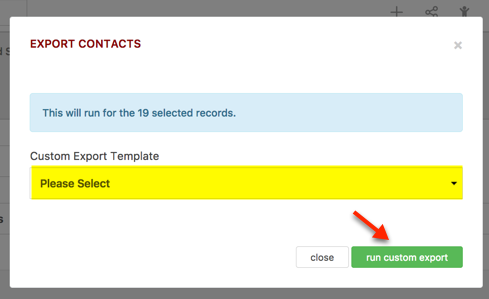
After selecting your export template and clicking Run Custom Export, a download of the export will begin. Once complete, you can then open up the custom export in Microsoft Excel. Note: we used a Quicklist above as our group of contacts, but it does not matter if you use a Quicklist, a Tag Group, run a new search or send contacts to your Search page from another report's results - the aim is to get them on your Advanced Search page so that you can produce your custom export.
Using your Custom Export Template Excel File to Make CRM Updates in Bulk
As mentioned toward the beginning of this post, once you have your desired data in front of you in Excel it's easy to see missing information on your client records.
If you have a lot to clean up or add and are comfortable working in Excel, we can assist you with getting your updated information back into Redtail CRM. Just note that you'll need to leave the default first column in its place as it is a unique identifier for each of your clients and will allow us to map everything correctly.
With that in mind, you can update, add, and edit the information in your Excel file for the contacts and save those changes. Then, email import@redtailtechnology.com letting us know you have a spreadsheet with updated information to be updated. We'll then send you a secure link to which you can upload your file and we'll take care of the rest after receiving.
Edit existing Custom Export Template
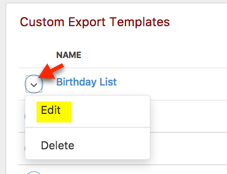
If you find that a custom export you've created needs to be edited, you can go to your main Custom Export Templates page and click "Edit" from the Custom Export's Actions menu:
You'll then be carried to the Custom Export Builder with all previously selected fields for the export template checked off. You can add or delete as needed and then save your changes to update this custom export template. If you'd like some ideas to kickstart Contact Data Cleanup within your office, our Training Team has some great tips you might want to view here. You can also view a recorded webinar on this topic here.
In our next Manage Your CRM series post, we'll take a look at Managing Mail Merge Templates in Redtail CRM. As always, if you have any questions along the way as we address these, you can reach out to our team at support@redtailtechnology.com or 800.206.5030. We are always happy to help you understand any aspect of Redtail CRM better so that you can better put it to use in your business!